

I recently bought a headlight unit from
e-bay as a spare. Cheap enough at £10, but, as expected,
it was pretty grubby and was probably from a bike that
had been standing outside for several years.
So I pulled it all apart to give it a good scrub in the sink with washing-up liquid and a toothbrush. It occured to me that maybe someone might want to dismantle a headlight unit at some stage of restoration, so on re-assembly I photographed the process.
Bearing that in mind, I'll use the pics to explain how to DISMANTLE the unit.
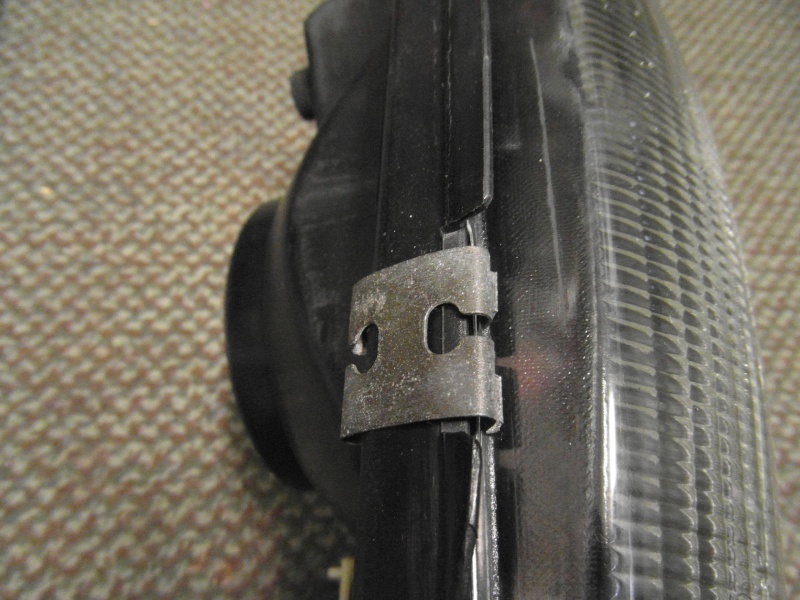
Firstly lever off the 6 spring clips that retain the glass and remove the glass.
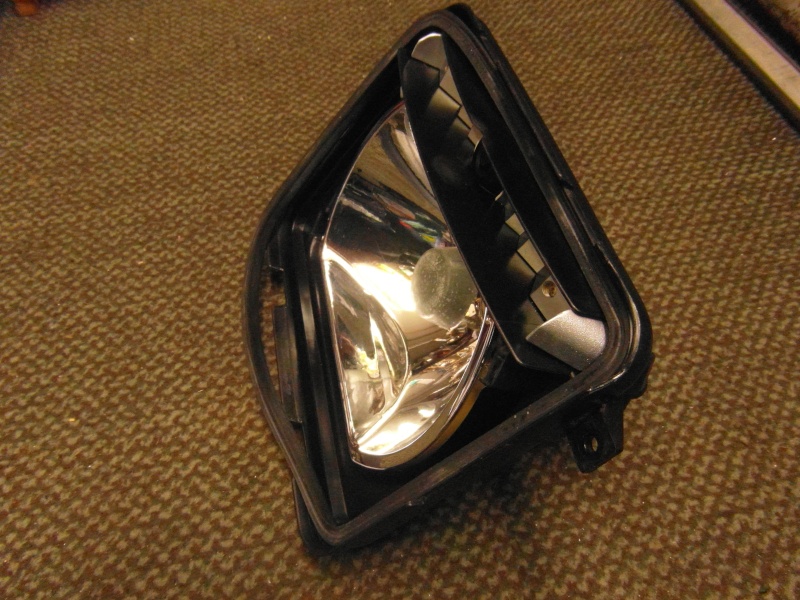
Then remove the sealing rubber and the pilot bulb 'reflector', which is held by 2 Phillips screws.
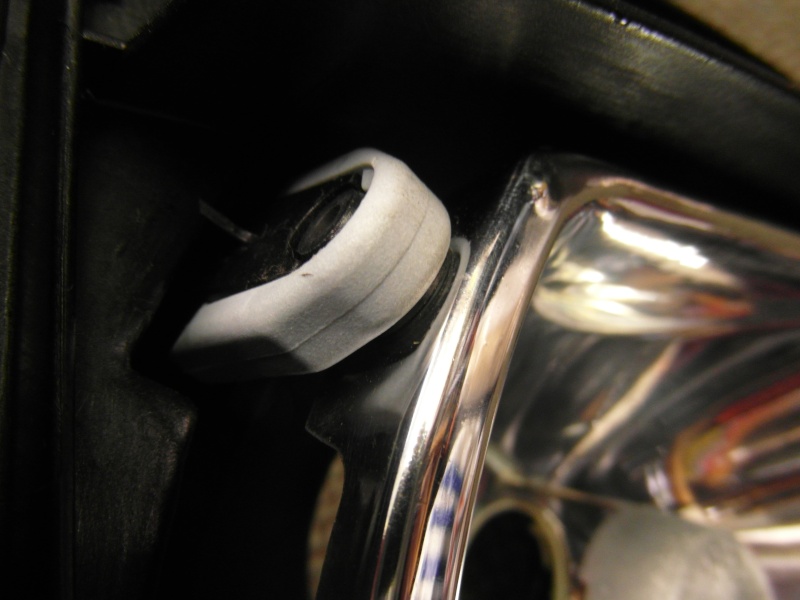
Next, unclip the grey plastic clip at the top left of the main reflector.
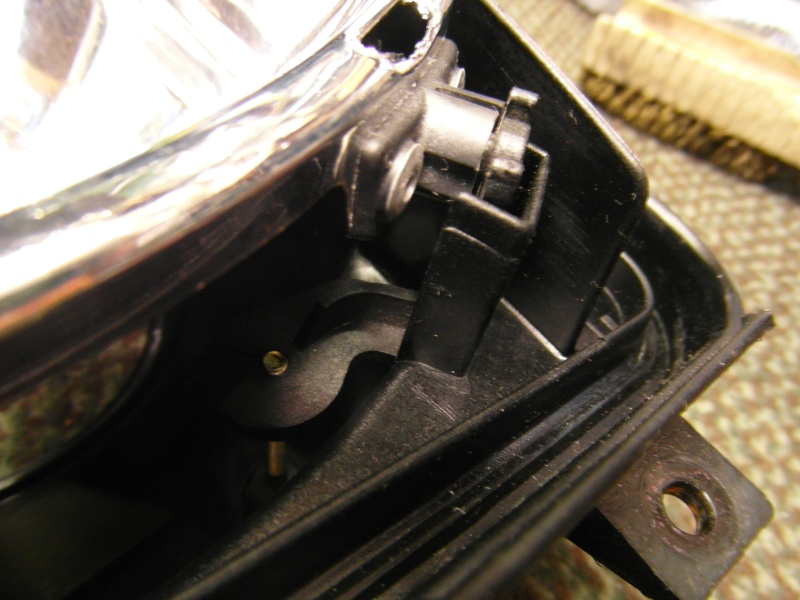
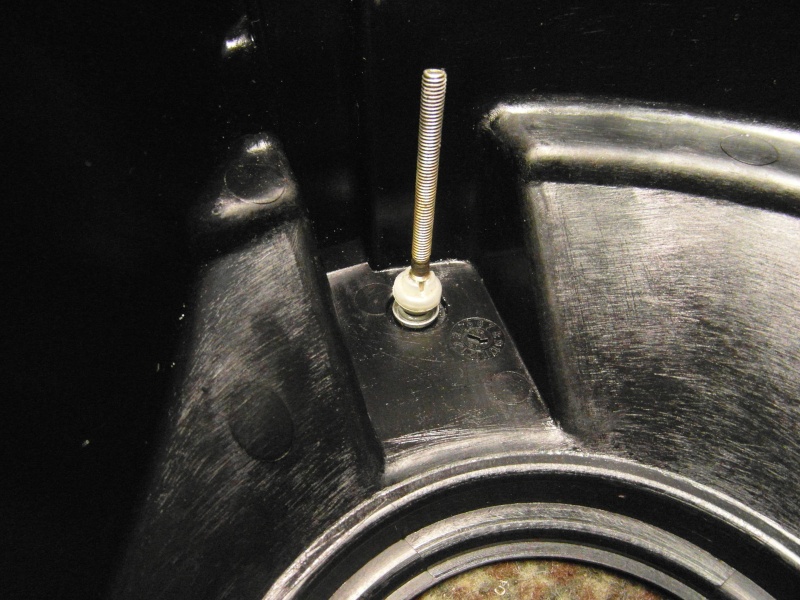
Now, looking at the back of the unit, unscrew the horizontal adjustment knob (top left).....

....until it releases the top reflector fixing.
You will now be able to pull out the top reflector fixing and pull the ball from it's socket at the lower left reflector fixing, releasing the reflector.
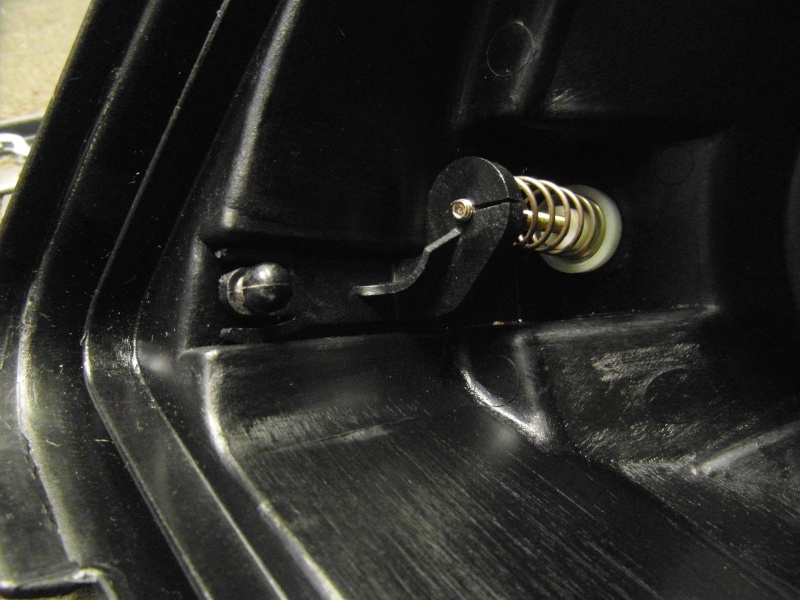
Unscrew the vertical adjustment knob and remove the cam assembly (which may be used to lower the beam when carrying a passenger). This allows the ball bracket to slide out of it's slot. Below the bracket is a spring which sits in a nylon bush.
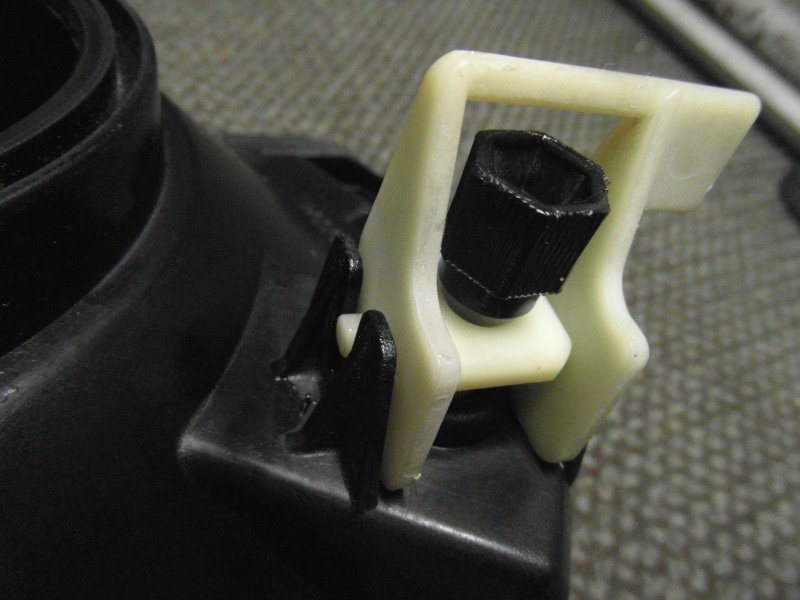
The vertical adjusting screw is held in position by a nylon clip, below the clip is a spring which sits in a metal cup washer. On re-assembly I found that a piece of metal tube was necessary to push the clip back into place.
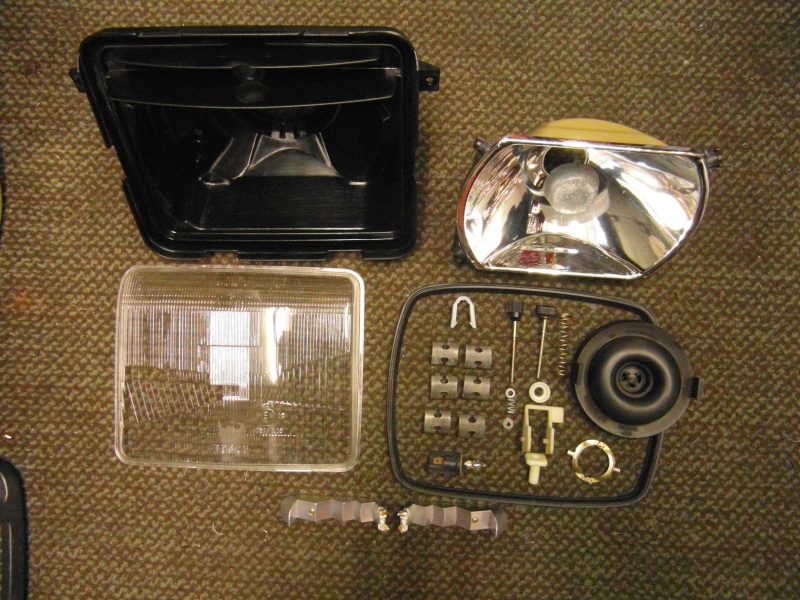
And here are all the bits ready to be put back together.
You will notice the folly of the PO using a 10W halogen bulb as a pilot light, the plastic 'reflector' is well melted. (Not a problem for me as, if I ever need to use this unit, I would have LEDs in there)
Paul.
So I pulled it all apart to give it a good scrub in the sink with washing-up liquid and a toothbrush. It occured to me that maybe someone might want to dismantle a headlight unit at some stage of restoration, so on re-assembly I photographed the process.
Bearing that in mind, I'll use the pics to explain how to DISMANTLE the unit.
Firstly lever off the 6 spring clips that retain the glass and remove the glass.
Then remove the sealing rubber and the pilot bulb 'reflector', which is held by 2 Phillips screws.
Next, unclip the grey plastic clip at the top left of the main reflector.
Now, looking at the back of the unit, unscrew the horizontal adjustment knob (top left).....
....until it releases the top reflector fixing.
You will now be able to pull out the top reflector fixing and pull the ball from it's socket at the lower left reflector fixing, releasing the reflector.
Unscrew the vertical adjustment knob and remove the cam assembly (which may be used to lower the beam when carrying a passenger). This allows the ball bracket to slide out of it's slot. Below the bracket is a spring which sits in a nylon bush.
The vertical adjusting screw is held in position by a nylon clip, below the clip is a spring which sits in a metal cup washer. On re-assembly I found that a piece of metal tube was necessary to push the clip back into place.
And here are all the bits ready to be put back together.
You will notice the folly of the PO using a 10W halogen bulb as a pilot light, the plastic 'reflector' is well melted. (Not a problem for me as, if I ever need to use this unit, I would have LEDs in there)
Paul.